Saturday, June 30, 2012

Project 5: Flower Skirt
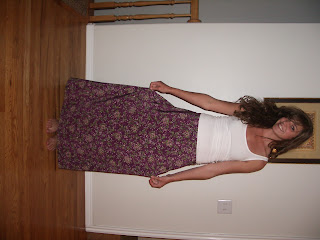
This isn't a terrible piece to start with. The waistband fits and the print is cute. However, the skirt is just a little bland. There isn't anything that really pops on this skirt and makes it memorable.

So I decided to buy some lace at Wal-Mart to add trim to the top of the pockets that I was adding to give this skirt the pinch of pazazz it was missing!

Step 1: Cut off 19 inches from the bottom

Step 2: Hem the bottom

Step 3: Cut two 6 x 6 inch squares from the cut off section using a ruler and a tracing pencil

Step 4: Press the squares over 1/2" on the the sides and bottom and 1" over on the top

Step 5: Fit the lace trim to the top of the pockets and sew on

Step 6: Sew on the pockets

The finished product:
Now this is a memorable skirt! I LOVE the lace trim, and with the extra trim I have, I was going to make a copycat headband that i saw at PacSun and a similar one at Aerie as well!


Friday, June 29, 2012

Project 4: High-waisted Skirt

This skirt is for my sister. She bought it at Saver's for $1.50! The print on this skirt really cute and unique, but the length is really awkward.


Step 1: Cut off 9 inches from the bottom of the skirt


Step 2: Hem the skirt

The Finished Project:

This was a quick fix! She paired it with a bright shirt and a skinny, brown belt.

Thursday, June 28, 2012

This is the skirt that started it all!


Project 3: Fitted Dress
I bought this skirt at Saver's for $2!

The pattern on the fabric is really pretty and the buttons down the front give it a fun twist! There isn't anything too terrible about this skirt... but it wasn't quite working as a skirt for me, neither was the belt it came with made of matching fabric.

Step 1: Create 6 darts. 2 in the front, 2 in the back, and 1 on each side, each made to fit my body to create a fitted bodice.


The darts are great because unlike taking it in, it allows me to keep the full skirt on the bottom without a baggy bodice.

Step 2: Cut off 4 1/2" from the bottom and hem it.

Step 3: Remove the belt loops

Step 4: Use the extra fabric from the bottom to create straps and fashion them onto the top of the dress

The finished Product: The once $2 skirt now looks like a $30 dress!


Project 2: Tribal Skirt
When I first purchased this awful piece of clothing I had no idea what I was going to do to save it, but I was drawn to the fun pattern  on the fabric and summery colors that I had to buy it!


There is way too much bright and crazy fabric! The maker of this dress should have either gone with less bright colors or a less complicated pattern. And the piece of fabric that crosses over should have a curve. The straight line doesn't help the overall image and makes the dress appear tackier than it already is.


Step 1: Cut off the top

Step 2: Hem the top

Step 3: Take it in 1 inch on each side

Step 4: Cut off part of the bottom and curve the side tie section

Step 5: finish the edge of the curve and hem the bottom

The finished product:

I love how fun and relaxed this skirt looks, it screams summer!


Sorry about not posting yesterday! I was experiencing technical difficulties with my computer. Sewing I can do, computers... not so much. To make it up, today I will post 2 days of work!

Tuesday, June 26, 2012

Project 1: Flower Power Dress
This is my first official project! I bought this dress at Saver's for a grand total of $3.50.
I can't decide if this was a church dress or a pioneer dress with shoulder pads. No matter how you look at it, this dress needs some serious help! The print is cute, but such tiny flowers on sooo much dress is never good. Between the shoulder pads, awkward sleeves, and horrid length, I couldn't wait to give this dress an extreme makeover!


Step 1: REMOVE THE SHOULDER PADS!


Step 2: Get rid of all that fabric


Step 3: Take it in 3 1/2 "  on each side


Step 4: De-Sleeve this bad boy


Step 5: Add on a little extra fabric to the bottom... I got a little carried away in step 2. Luckily I saved the chopped pieces and used the original hem so I didn't have to hem it myself!


The finished product! This new summery dress is ready for everything from free summer concerts to Sunday church!


Welcome to Cheap Chicks! This blog shows how to take outdated, old, or generally hideous clothes and creating something cute and in style. I was inspired to make this blog by looking at a blog called refashionista. I loved the way she took the most repulsive piece of clothing and made it presentable again. Just that week, I had taken a trip down to Saver's with my friend Amy and bought a skirt to alter. I was so in love with the skirt that I altered that I couldn't wait for next Monday (sales day at Saver's) to stock up on some drop dead ugly clothes!